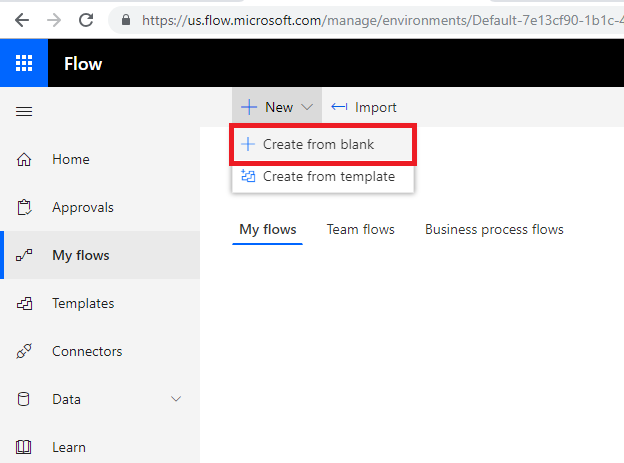
Quantcast
Channel: Sam's Activities
Viewing all 3363 articles
Browse latest View live

Attachments in Field Service Mobile Application

$
0
0

Hi guys,

I was trying to attach documents in the Work Order and the Service Tasks on that work order from the Field Service Mobile App. However, upon trying to do that I saw that I can only capture photos and attach or add notes as text. However I cannot attach any documents / attachment  to either Work Order or Service Tasks. I also read on the community that this is a gap on the Field Service module for the app.

Is there a work around for this? How can I attach documents to both of these entities from the Mobile application so that they directly get uploaded to their respective folder on Sharepoint?

Thanks in advance. :) 


Set Date and Time Field of Dynamics 365 in PowerApps

$
0
0

Introduction

Power App helps you to create a quick mobile app to show details of your CRM organization. In today’s blog, we will explore more on how to set Date and Time field of Dynamics365 in Power App.

Following are the steps to set Date and Time fields of Dynamics 365 in Power Apps:

1. Create a default Canvas app for appointment entity by using Dynamics 365. You can refer our previous blog here.

2. As you know appointment entity contains two date and time fields i.e. “Start Time” and “End Time” as shown in below screenshot:

Dynamics365 Power App

Let’s set the value of “Start Time” and “End Time” through Power App.

3. Now in “Edit screen” in power app you can see the “Start Time” and “End time” fields with “date and time” data type as shown in below screenshot:

Dynamics365 Power App

4. Now on “onSelect” property of “IconAccept”  add patch formula as given below:

Patch(

Appointments,

First(

Filter(

Appointments,

activityid = BrowseGallery1.Selected.activityid

)

),

{

scheduledstart:  If(

IsBlank(DateValue1.SelectedDate),

Blank(),

DateValue1.SelectedDate + Time(

Value(HourValue1.Selected.Value),

Value(MinuteValue1.Selected.Value),

0

)

) ,

scheduledend:  If(

IsBlank(DateValue2.SelectedDate),

Blank(),

DateValue2.SelectedDate + Time(

Value(HourValue2.Selected.Value),

Value(MinuteValue2.Selected.Value),

0

)

)

}

)

Dynamics365 Power App

5. Let’s run the app and set “Start Time” and “End Time” for a record in CRM through Power App by selecting

 in power App.

Dynamics365 Power App

Now as shown below the “Start Time” and “End Time” values are updated in CRM:

Dynamics365 Power App

Conclusion

By using the simple steps we can set date and time fields of Dynamics365 in Power App.

To help evaluate your business needs and design a custom app for your specific requests reach out to us at crm@inogic.com | Read our blog series on Microsoft PowerApps

One way to overcome “429” error (concurrent requests limit exceeded error) in Dynamics 365 CRM Web API

$
0
0

Introduction

With JavaScript, we have real-time interaction with Dynamics 365. Microsoft gives us feasibility to use CRM Web API in JavaScript to perform operations such as Create, Update, Delete, Retrieve, etc.

But there is a limitation on the number of API requests made by each user, per organization instance, within a five-minute sliding window. Please refer the below blog for more details:

https://docs.microsoft.com/en-us/dynamics365/customer-engagement/developer/api-limits

This limit will cause the issue to the organization which is using a large number of requests for their application.

The application will throw “429” error which will give this type of message: “Combined execution time of incoming requests exceeded limit of 1,200,000 milliseconds over a time window of 300 seconds. Decrease the number of concurrent requests or reduce the duration of requests and try again later.”

Solution

To overcome this error, we have used JavaScript’s setTimeout() function. setTimeout() for single request works as expected but in order to use setTimeout() in for loop you need to add extra piece of code to get a proper result i.e. by using setTimeout() with IIFE (Immediately Invoked Function Expression).

var waitInterval = 300;

for (var i = 0; i < result.List.length; i++) {

(function (i) {

setTimeout(function () {

crmAPI.Create(entityName, record).then(function success(result){

});

}, waitInterval * i);

})(i);

}

You can change the waiting interval based on number of requests.

Conclusion

By using JavaScript’s setTimeout() with IIFE (Immediately Invoked Function Expression) we can overcome the CRM API limit.

Assign Security Roles to App

$
0
0

Hi

We used to have More Options(...) button on each app at https://home.dynamics.com . You can change URL for the APP and select what security roles required to access the app. I do not see that option there anymore. Anybody have any any idea that how can I set security roles for an app?

Trying to add data in Account from import the excel.

$
0
0

Hi,

I am trying to add data in Account Entity through Importing the Excel sheet, I have exported the template then cleared the data now after clearing data trying to import the data by clicking on Import data after browing the url. the result what i am getting is not adding the data but its getting updated.

Please help me out to add the data in Account entity through importing the excel.

Thank You,

Uttam Chavan

Link Existing Customers and Products between QuickBooks Online and Dynamics 365 CRM using InoLink

$
0
0

Introduction

InoLink has a great feature named ‘Link Existing Customers’ and ‘Link Existing Products’, using which, the user can link all your existing Customers i.e. Accounts and Contacts, and Products between the two systems i.e. Dynamics 365 and QuickBooks Online.

Let’s say you have been using Dynamics CRM, and QuickBooks Online for a long time and until now you have been managing both the systems manually i.e. whenever you change a name of one Account record in Dynamics CRM, you do the same manually in QuickBooks. No need to do that anymore.

Using InoLink’s Link Existing Customer feature you can link all the Account, and Contact records between the two systems hassle free.

Once you have configured your QuickBooks Accounting Company in Dynamics CRM using InoLink, you will see Link Existing Feature under the section ‘What would you like to do?’ as shown in the below screenshot.


Link your Existing Customers and Products between QuickBooks Online and Dynamics CRM using InoLink

This is the view of Link Existing Customers.

Let’s focus on how to make the most of this feature, starting from the top of the screen.

1. Look for:

This is a dropdown which contains only 2 values i.e. Account, and Contact. Depending on which entity record to sync, user can select his desired option.

Link your Existing Customers and Products between QuickBooks Online and Dynamics CRM using InoLink

2. Use Saved Views:

This dropdown will populate all the available views in your Dynamics 365 CRM for the selected entity in Look for: field.

Link your Existing Customers and Products between QuickBooks Online and Dynamics CRM using InoLink

3. Show:

Here, the user can select the type of records that need to be displayed. If ‘All records’ option is selected, then it will display Linked as well and Unlinked records between both the systems. Similarly if ‘Linked records’ option has been chosen, then only Linked records between both the systems would be displayed in the grid.

Link your Existing Customers and Products between QuickBooks Online and Dynamics CRM using InoLink

Let’s see how the ‘Linked records’ view looks like if selected.

Link your Existing Customers and Products between QuickBooks Online and Dynamics CRM using InoLink

As there is only one linked records between both the systems, only one record has been displayed in the Grid.

Now let’s move on how to link all the records between both the systems.

Link your Existing Customers and Products between QuickBooks Online and Dynamics CRM using InoLink

Link Existing feature has a button named Smart Match, on clicking, it would match all the records between both the systems automatically. It matches all the records with its exact name, if it doesn’t find exact name, then it tries to search for a similar name i.e. if you have an Account in Dynamics 365 CRM named Inogc and in QuickBooks online you have a Customer named Inogic, then it will link both these records.

Once clicked on Smart Match, it will start processing all the records, match the records based on the name, and link the records between the two systems.

If a user wants to cross match records between QuickBooks and Dynamics CRM, that is allowed as well, i.e. if there’s an Account named Inogic in CRM, and in QuickBooks, it is named Inogic India Tech Pvt. Ltd., as these both records are of the same company, user can cross match and link both these records.

Link existing feature doesn’t allow the user to match same QuickBooks record to two different Dynamics CRM record. If a user will tries to do that, then an error popup would be displayed saying –

Link your Existing Customers and Products between QuickBooks Online and Dynamics CRM using InoLink

The reason InoLink doesn’t allow to set same QuickBooks record for two CRM record is that, if it links both CRM record to one QuickBooks, then there are chances that your QuickBooks data might get corrupted.

Finally, on clicking on Save button, all the records that have been matched with each other, or cross matched will get linked, and whenever our QuickBooks to Dynamics CRM services would run, it would update the records that have been linked, and similarly if you update a record in Dynamics CRM, it would update the same linked record in QuickBooks.

Conclusion

With the help of Link Existing feature you can link the records in Dynamics 365 CRM and QuickBooks automatically.

Create report in PDF

$
0
0

Hello Team,

I have create a report in reporting section and now i want to create a custome work flow through that i can convert this report into pdf with the download option.

Thanks

Open PowerApps from Inside Dynamics 365 CRM

$
0
0

Introduction:

PowerApps applications were developed for showing the Dynamics 365 CRM entities. To use these applications, it was opened outside Dynamics 365 CRM.

But, there is a way to open these Apps from inside the Dynamics 365 CRM.

Actually, every developed PowerApps application has its own web link and through this web link we could see Apps from inside Dynamics 365 CRM.

Given below are the steps to see the apps from inside Dynamics 365 CRM.

1. Go to Apps section in the Power Apps.

Open PowerApps from inside the Dynamics 365 Customer Engagement

2. Select the App which you want to open from the CRM and select the “…” more options button and click on Details.

Open PowerApps from inside the Dynamics 365 Customer Engagement

3. Once you click on Details, you will see the unique web link of the App.

Open PowerApps from inside the Dynamics 365 Customer Engagement

4. So, we can just open that Web Link from the CRM by clicking the Ribbon button.

You can also see that we have added a button on the dashboard and by clicking it we can open the PowerApps application.

Open PowerApps from inside the Dynamics 365 Customer EngagementRemove term: Microsoft PowerApps Dynamics CRM Microsoft PowerApps Dynamics

5. After clicking the button, we need to write a javascript function to open the PowerApps by using the web link.

Open PowerApps from inside the Dynamics 365 Customer Engagement

Conclusion:

As illustrated above, PowerApps applications can be opened inside Dynamics 365 CRM.

Hope this helps!

PowerApps


Update existing records in CDS (Common Data Service) using Microsoft flow

$
0
0

Introduction:

In one of our previous blog, we have seen how to create records in Dynamics 365 CRM using Microsoft flow mobile app.

In this blog we will see how we can update the existing record in CDS environment using flow mobile app.
For an example, we want to update the particular Account record using this flow. Let’s see how we can create the flow to update the account’s record in CDS.
The steps need to be followed for the same as below:
Go to the https://flow.microsoft.com/en-us/ and sign in with your credentials.
To create a flow we will choose option as Create flow from blank as shown in screenshot below:

On next page again select the same option.

As we want to update the record using Flow button from mobile, we will choose ‘Flow button for mobile’ connector as shown in screenshot below:

Next, click on Add an input and create required data fields which we want to update in Dynamics 365 CRM for the account entity records. Here we will take sample fields as shown in the screenshot below:

After that, first we need to retrieve the records to update the same. To get the records we need to select Common Data service connector and select List records as an action as below:

Then select the organization name and entity name for which we are retrieving the records to update the same as shown below. To retrieve the records we can also add the filter query to filter the records.
Here we want to update the particular record, so we will retrieve the records based on Account name field. For the same we will add the Filter Query from Advanced options as shown below:

On this steps, it will return the account records on the base of filter query.
Next, select the Common Data service connector again and choose update a record action in that to update the records which we will get in the previous step.

Once we add the connector as shown above we need to select the organization name and entity for which we want to perform this steps.

Then, set the record identifier of the account to update that particular record in CDS as shown in screenshot below:

After the same, this step will be shown as below and we need to map the field which we want to update.

So, as we are updating the records through the Microsoft flow mobile app, if we want notification once the record get successfully updated in CDS, we will add more step to get the mobile notification.

To get the same add “Notification” as a connector and you can write text to get as a notification on mobile and save the flow as shown below:

So, now user can easily run the flow from mobile app by connecting to the CDS and update the existing record same as shown in our previous blog while creating new record in D365.

Conclusion:

By using Microsoft flow mobile app it is easy to update record without going into the CDS environment.

1 Click to Export Word Templates and Email or Attach as Note or Upload to SharePoint within Dynamics 365 CRM

$
0
0

Dynamics 365 CRM is an extremely powerful system that caters to various functionalities of Sales, Service, Marketing, Finance and other domains. Dynamics 365 helps to create Reports and Word Templates which further strengthens its capability. Although it is a complex process to export these Reports/Word Templates, yet it empowers Dynamics 365 users with the ability to view their Quotes, Orders, Invoices, etc. offline.

Most of the times when Dynamics 365 CRM users are required to send Reports/Word Templates to their clients, at first they have to programmatically export each template. But, for the smooth functioning of business activities, it is necessary to reduce the time spent in exporting these Templates. Therefore, leveraging the ability of Dynamics CRM to export Report/Word Templates, we developed a 1-Click productivity app – Click2Export – that expedites the process of exporting Dynamics 365 CRM Reports and Word Templates in just one click.

With Click2Export users can not just export these Reports/Word Templates, they can also perform multiple actions on them. When Workflow automation is done for Word Templates, these actions can be auto-assigned to the templates. These actions are – Attach as a Note, Attach to an Email and Upload to SharePoint.

Let’s consider a scenario where a team member of Grapevine Enterprises, Sam, wants to send Quotes to his clients attached to an email on change in Effective To date. For this Sam creates a workflow for Quotes, sets the triggers as change in Effective To date and selects the action Attach to an Email for sending it to the client with updated dates, Attach as Note for keeping a back-up internally and Upload to SharePoint for external back-up.

Note or Upload to Sharepoint within Dynamics 365 CRM

Now, when there is a change in Effective To date, the workflow will trigger and the following actions will be performed on the exported Word Template – an email with exported Quote Word Template as attachment will be sent to the client, it will be attached against the record as a Note and will be uploaded to SharePoint against the record’s folder.

Here, the Effective To date is set as 25th April 2019.

Note or Upload to Sharepoint within Dynamics 365 CRM

Due to business requirements, it is changed to 26th April 2019. This change in date triggers the workflow.

Note or Upload to Sharepoint within Dynamics 365 CRM

As soon the process has completed, an Email along with the exported Word Template is automatically sent to the client and Attached as a Note.

Note or Upload to Sharepoint within Dynamics 365 CRM

It is also Uploaded to SharePoint against the record’s folder.

Note or Upload to Sharepoint within Dynamics 365 CRM

Thus, Sam can perform faster and take quick actions to keep his clients updated. This is a very powerful feature as it redefines the entire productivity by considerably saving time and effort through automating the process. With Click2Export you can augment your productivity by efficiently interacting with your clients for their business needs.

We encourage you to try Click2Export for workflow automation and its many other features. If you have not tried the solution as of yet, download it from our Website or Microsoft AppSource!

Happy Exporting!

UCI - Import data button image is not displayed properly

$
0
0

Hi All

Import data button image is not displayed properly in the UCI.

How can I modify the Save and Route button on Case form

$
0
0

Hello,

I have a requirement to update a date and time field on-click of the Save and Route button on the Case form. 

Using the Ribbon Workbench, I realized that it is not possible to add a web resource to the command field.

Does anybody know how best to implement this?

Thanks

How to solve “You do not have enough privileges to access the dashboard” or “There was an error retrieving the charts” on the dashboard

$
0
0

Introduction

Recently one of our clients faced an issue where a user with whom the personal dashboard was shared, was getting an error while seeing the dashboard. We shared the personal dashboard with the user but the user was still unable to see the charts in the dashboard. So, after delving into the reason we found that the view used in personal dashboard while sharing the dashboard was a personal view.

So in this blog we are going to explain the cause which restricted the other user to see the data in the dashboard.

Suppose User “Sam” has created a Personal Dashboard “Opportunities with Actual Close date” and shared with another User “John” by using the button Share Dashboard.

Dashboard

Here John could see the dashboard with error as shown below.

Dashboard

Then we checked for the view which was used in the dashboard and figured out the view used to configure the dashboard was also a personal view.

Dashboard

This was because the view that was used to build the Dashboard was not shared with the user “John.”

Here the view was shared with the user “John,” he was able to see the Dashboard with relevant data.

Dashboard

Though a small missed setting but much needed to see the data.

Conclusion

In order for another user to be able to see your personal dashboard you also need to share your personal view.

click2clone

Add Fields in XML Mapping of Existing Word Template Used In Dynamics 365 CRM

$
0
0

Introduction

In Microsoft Dynamics 365 CRM there is an option to create Word Templates. The Word Template feature was introduced in the MS Dynamics CRM 2016. It is useful to create templates for generating documents in a standardized format. To display entity data in standardized format we can export word template. But, these word templates contain the entity metadata (i.e. fields, relationships, etc.) till the template is downloaded.

In our last blog we have seen Word Template feature in Dynamics CRM 2016, in this blog we will see how we can add the new fields of entity in XML Mapping of word template.

Here, on Contact entity we have created a new field with name “Contact Type (new_contacttype)” and this field is not present in XML Mapping of Word Template as shown below.

XML Mapping

Below are the steps to add this field in XML Mapping of existing Word Template:

1. We are considering “contact.docx” custom word template file and are adding new fields in this word template.

2. To add new fields in this file, rename “contact.docx” word template file and change extension from “.docx” to “.zip”.

3. Extract “contact.zip” file and you will see the extracted folder as below:

XML Mapping

4. Open “customXml” folder from extracted “contact.zip” file and then open “xml” file in editor to add fields.

5. Then add the new field in “item1.xml” file as shown below:

XML Mapping

Here, we are adding the field with logical name new_contacttype in XML Mapping of word template. You can add multiple fields like this as well. After adding all necessary fields save the “item.xml” file.

6. Go back to the “contact.zip” folder and navigate to “customXml” folder. Then, replace “xml” file of “contact.zip” file with this edited file.

7. After that rename “contact.zip” and replace extension back to “.docx”.

8. Now, you will see the “Contact Type” field in XML Mapping of “contact.docx” word template as shown below and you can use this field to map in word template.

XML Mapping

Conclusion

You can add new fields of Dynamics 365 CRM entity in mapping XML of word templates.

Execute Action with ColumnSet(ComplexType) type parameter Using Xrm.WebApi.online.execute in Dynamics 365 CRM V9.0

$
0
0

Introduction

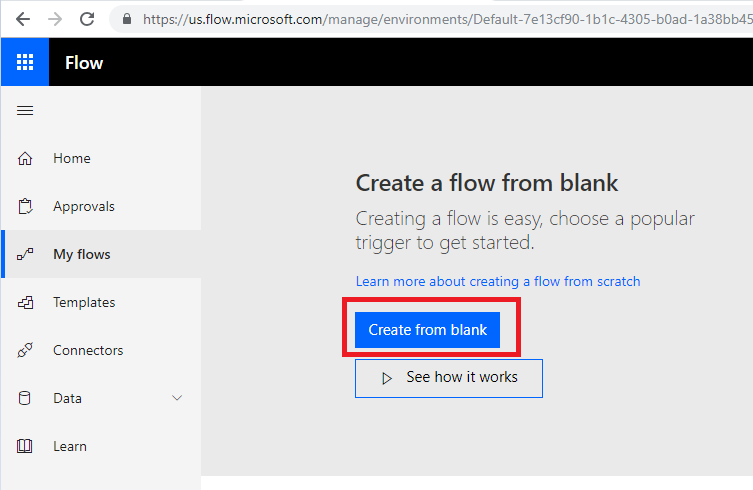
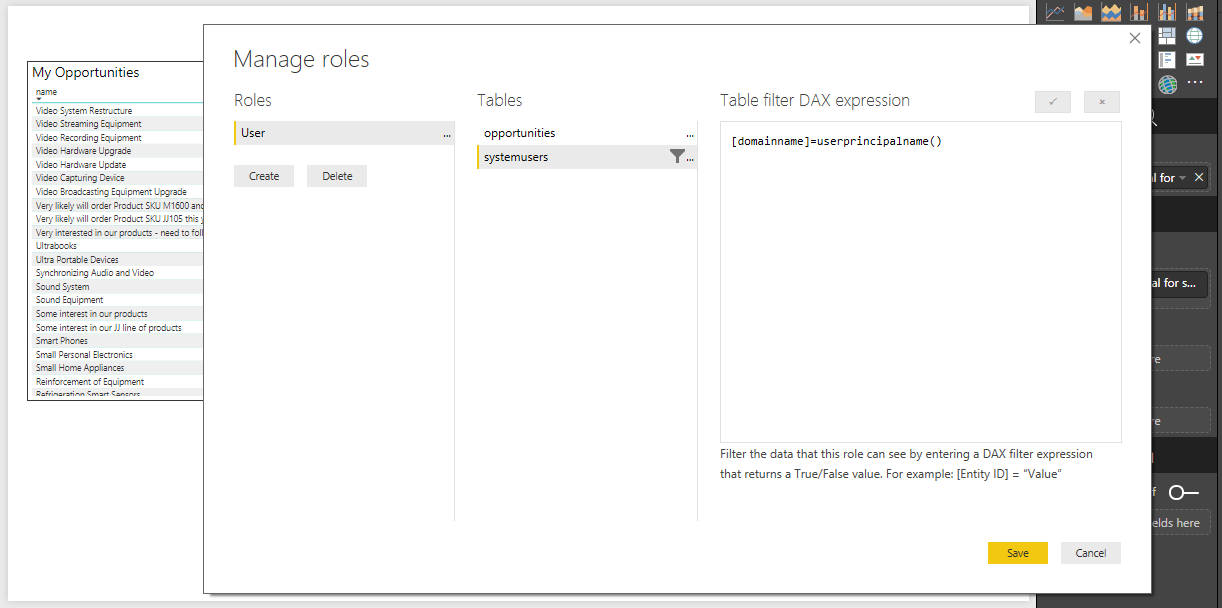
Microsoft has introduced Xrm.WebApi.online.execute to execute an action in Dynamics CRM version 9.0. In our last blog we have seen how to Execute action using Xrm.WebApi.online.execute in Dynamics CRM. In this blog we will see how to execute action with “ColumnSet(ComplexType)” type property.

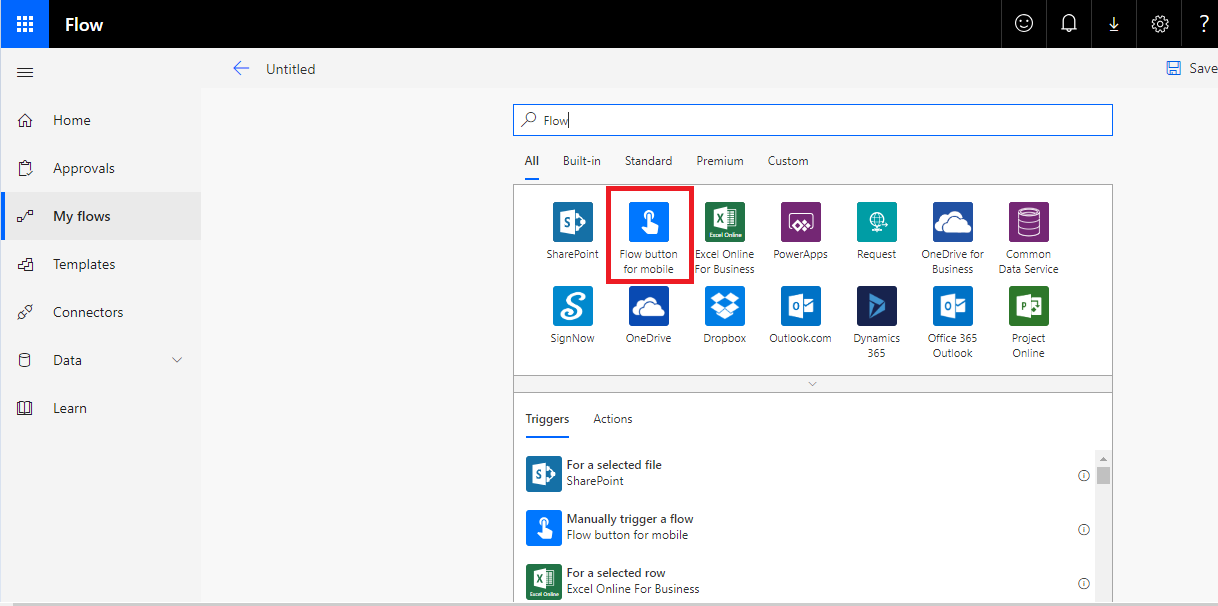
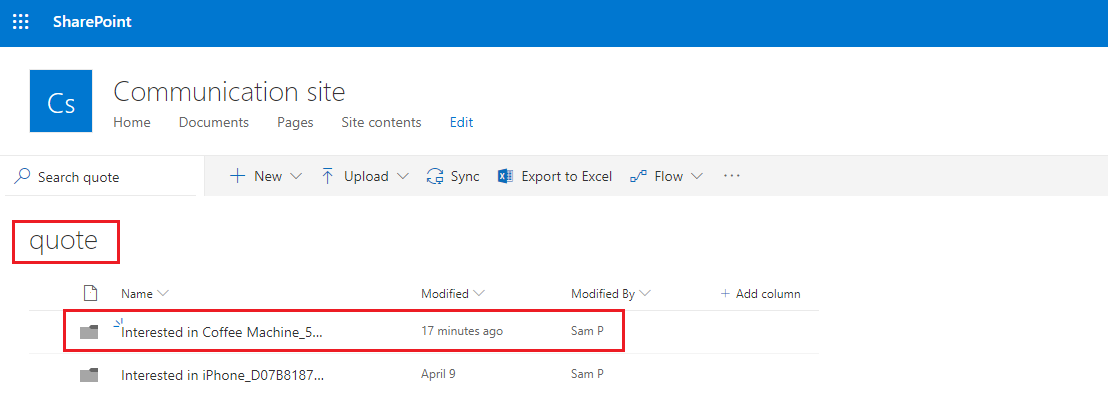
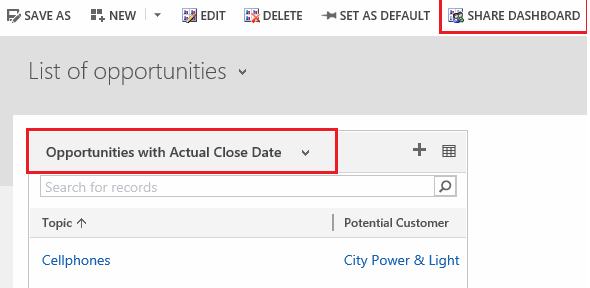
Here we are executing “GenerateQuoteFromOpportunity” action for sample purpose as this action contains the “ColumnSet(ComplexType)” type parameter.

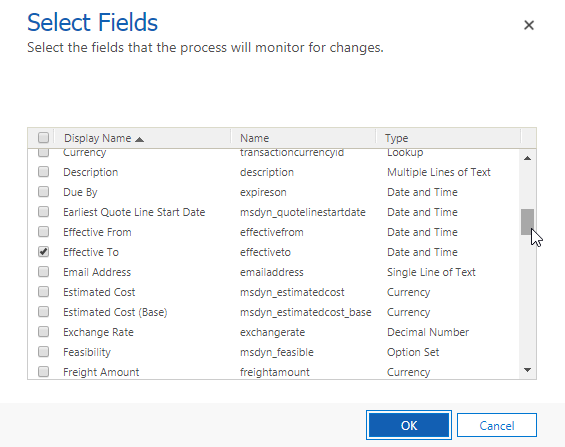
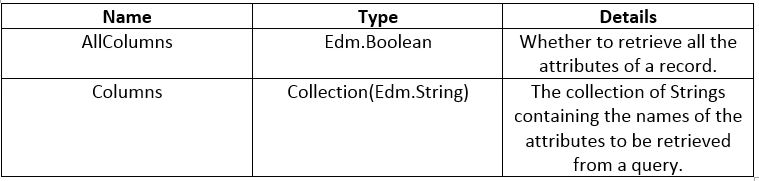
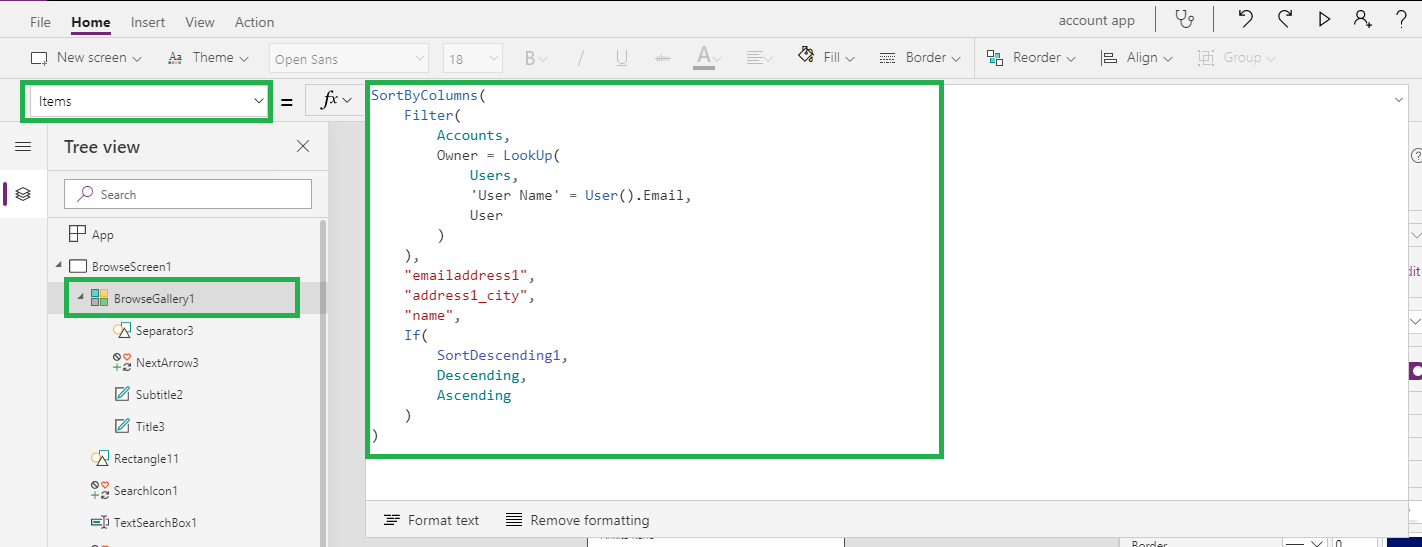
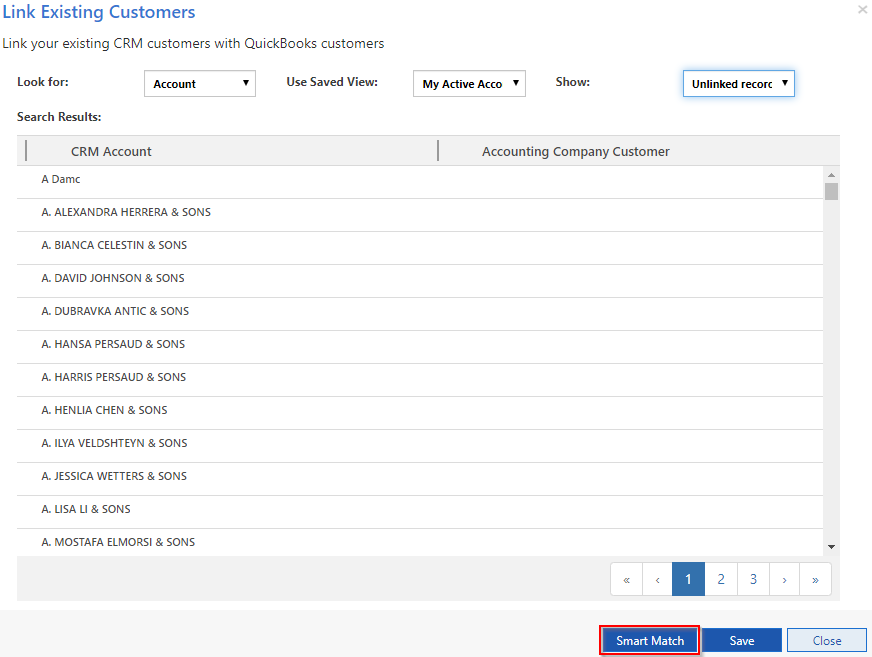
Properties of ColumnSet(ComplexType) parameter:

xrm

For these properties we need to add another getMetadata method as shown in the below example.

Syntax:

Xrm.WebApi.online.execute(request).then(successCallback, errorCallback);

successCallback: This function call is for when is action executed successfully.

errorCallback: This function call is for when there is any error while executing action. It returns an error as result in string format.

Given below is the example of how to write the function to execute “GenerateQuoteFromOpportunity” action:

Generate Parameters:

/**

* This function generates quote from opportunity using GenerateQuoteFromOpportunity action

* @param formContext

* @param opportunityID

*/

function executeAction(executionContext) {

let functionName = “executeAction”;

var opportunityID = null;

var formContext = null;

try {

debugger;

//Get form context

formContext = executionContext.getFormContext();

//Get opportunity id

opportunityID = !isValid(executionContext.getFormContext().data)

|| !isValid(executionContext.getFormContext().data.entity)

|| !isValid(executionContext.getFormContext().data.entity.getId)

? null : executionContext.getFormContext().data.entity.getId();

//Set parameters

var GenerateQuoteFromOpportunityReq = function (OpportunityId, ColumnSetVal) {

this.OpportunityId = { “guid”: OpportunityId };

this.ColumnSet = {

“AllColumns”: ColumnSetVal,

“getMetadata”: function () {

return {

boundParameter: null,

operationType: 0,

operationName: “GenerateQuoteFromOpportunity”,

parameterTypes: {

“AllColumns”: {

“typeName”: “Edm.Boolean”, //Primitive Type

“structuralProperty”: 1

}

}

}

}

};

this.getMetadata = function () {

return {

boundParameter: null,

parameterTypes: {

“OpportunityId”: {

“typeName”: “Edm.Guid”, //Primitive Type

“structuralProperty”: 1

},

“ColumnSet”: {

“typeName”: “mscrm.ColumnSet”, //Complex Type

“structuralProperty”: 2

}

},

operationType: 0,

operationName: “GenerateQuoteFromOpportunity”

};

};

};

var generateQuoteFromOpportunityReq = new GenerateQuoteFromOpportunityReq(opportunityID, true);

}

Execute Action:

Xrm.WebApi.online.execute(generateQuoteFromOpportunityReq).then(function (result) {

//Validate result

if (!isValid(result) || !isValid(result[“responseText”])) {

return;

}

else {

//get result in JSON object

var resultJson = JSON.parse(result[“responseText”]);

//Validate JSON

if (isValid(resultJson)) {

//Validating the attributes

if (!isValid(Xrm) || !isValid(Xrm.Navigation)) { return; }

//openAlertDialog

Xrm.Navigation.openAlertDialog({ confirmButtonLabel: “Ok”, text: “Quote with ID: ” + resultJson.quoteid + ” is generated successfully. ” });

}

}

}, function (error) {

throwError(functionName, error);

});

} catch (error) {

throwError(functionName, error);

}

}

On success it returns a promise object with specific attributes.

In above example we have used ‘AllColums’ property of “ColumnSet(ComplexType)” parameter. In the same way we can use ‘Columns’ parameter. We just need to set “Edm.String” as typename in getMetadata method.

Conclusion

In this blog, we have seen how we can execute action with “ColumnSet(ComplexType)” type parameter using Xrm.WebApi.online.execute in Dynamics 365 CRM V9.0.

Click2Clone-One-Click-Productivity-App-to-Copy_clone-Dynamics-365_CRM-Records


Schedule, Track and Manage Alerts in Dynamics 365 CRM the smart way with our new upcoming App – Alerts4Dynamics!

$
0
0

We are in the season of new releases! All our products are being polished with new features and soon there will be a wave of updates to revolutionize your Dynamics 365 experience. As you know, Dynamics 365 is a vast system that has innumerable processes running in synchronization and since number of users working in a Dynamics 365 organization can be large, it is usually little tricky to manage them together. It is mandatory that the users of an organization stay up-to-date with the CRM’s ongoing processes and activities in order to act quickly without interrupting the system.

For long, we have been getting requests to introduce a provision for notifying users in Dynamics 365 CRM about the various updates made. Therefore, here we are, soon launching another powerful application in the league of our versatile productivity apps viz. Alerts4Dynamics! It is no more a distant deal to schedule and manage alerts in Dynamics 365 CRM. It’s all in grab with this intelligently developed app that enables you to notify your CRM users universally on multiple levels. Whether you want to inform the users of holiday, or want a particular user to reactivate a Quote, or wish to change the status of a record, all you have to do is send them notifications!

For sending these notifications you need to follow simple methods and can personalize the entire experience. Managers can create their own messages, set the date of activation and expiration for alerts, define whether they want the alerts to convey some Information or warn the users about some impending event, or intimate them about something critical. In a nutshell, Alerts4Dynamics is a comprehensively designed adaptable app for Dynamics 365 CRM that allows transferring instructions to the users in form of notifications. Alerts4Dynamics also allows sending the notification to users through email apart from displaying it in the CRM.

Dynamics 365 CRM alerts

However, there is still one concern, even though the manager might configure an alert with the message, how will he come to know whether a notification has been seen by a user? For this, we have enabled the provision for keeping track of alerts read or dismissed by the users. It gives the manager a stronger grip over the information he needs to pass to their users and trace if they have been received or not. With this blog we are covering the functional and user perspective of the product. In our next blog coming along with the release, we will delve into the technicality of Alerts4Dynamics for you to better integrate the solution in your Dynamics 365 CRM which also works in PowerApps (CDS). For now, let’s understand why we designed this product and how it will accelerate your workforce towards better goals.

Accessibility

With this powerful application managers can stay in touch with their users individually to pass on the details and instructions. You can also notify your users by creating alerts in your CRM through mobiles and tablets.

Time Effective

By notifying the users without conducting a meeting, it saves a lot of time by simply creating personalized alerts.

Precision

As alerts are created in Dynamics 365 CRM they can be carefully reviewed for accuracy. The clear instruction to each user can be given in the form of alerts to prevent skipping any details that might be forgotten otherwise.

Globally Applicable

As the alerts can also be created on global level every user in the CRM can view the alert and act in accordance.

Track Alerts for Optimal Control

All the notifications can be seen together. The status of read or dismissed notification can also be seen with user details.

Increase User Adoption

By passing on the directions to users promptly the manager can nurture a better user adoption of its workforce.

Therefore, it considerably expands your reach and allows you to manage the functioning of your Dynamics 365 CRM like never before. Add, View and Manage alerts to prevent any roadblocks or hazards and gain confidence of your users by being proactive.

Before we sign off, we also want to inform you that we are exhibiting at Booth #22 in Atlanta at MBA Summit. Freshly brewed Alerts4Dynamics and other products’ updates will be demonstrated by our talented team exclusively and they will also be attending to any queries you may have. We are truly excited about the Summit and meeting you for an enriching experience.

You can also read more about the product Alerts4Dynamics from our Website!

See you soon!!

Filter records in PowerApps based on the owner of the record in Dynamics 365 CE

$
0
0

Introduction

In today’s blog we will explore how to filter records in PowerApps of Dynamics 365 CRM based on the logged in user in the PowerApps.

Now I have created a default Canvas app for Account entity. As you can see in below screenshot, the list contains all the account records belonging to different users:

PowerApps Dynamics 365

Now we have to filter the records based on the logged in user in PowerApps. To achieve this please follow the below steps:

1. Create a default Canvas app for appointment entity by using Dynamics 365 CRM. You can refer our previous blog here.

2. Now, edit the “Item” property of BrowseGallery:

SortByColumns(

Filter(

Accounts,

Owner = LookUp(

Users,

‘User Name’ = User().Email,

User

)

),

“emailaddress1”,

“address1_city”,

“name”,

If(

SortDescending1,

Descending,

Ascending

)

)

Please see the screenshot below:

PowerApps Dynamics 365

The above formula filters the account records by implementing the condition if ownerid is equal to the logged in user by using the function User() in PowerApps.

The User() function in PowerApps returns the information as Email, Full Name and Image about current logged in user in PowerApps.

You can refer this blog to gets more details.

3. Now log in to the other user and you will see the app contains those account records which belongs to the user:

PowerApps Dynamics 365

Conclusion

By implementing the above steps we can filter records of Dynamics 365 CRM in PowerApps based on the owner of the records.

services

Useful tip for the Local and UTC setting in PowerApps

$
0
0

Introduction

Handling dates with Date Time Zone in PowerApps can be tricky. So while handling the dates in PowerApps you should be aware of few Date Time Zone settings. In this blog we will be discussing the same.

Date Time Zone Property in PowerApps can be set through Date Picker control. Under PowerApps inside Date Picker control there are two options available for Date Time Zone – Local and UTC respectively. You can find the same in below screenshot:

Useful tip for the Local and UTC setting in PowerApps

Depending upon which option you select in Date Time Zone, the date and time returned by the control behave differently. So make sure that this value is set correctly to meet your business scenario.

When you are developing PowerApps you need to make sure whether to use Local or UTC Date Time Zone depending upon the connector you are dealing with.

The user should experience the same date in PowerApps as well as in the connector to which PowerApps is integrated with.

In this blog we will explore a simple setting to handle the date and time fields of Dynamics 365 CRM according to user time zone in PowerApps.

Let’s consider an example by creating sample PowerApps which will demonstrate how Local and UTC date pickers work:

1. Create a default Canvas app for Opportunity entity by using Dynamics 365 CRM. For know-how you can refer the blog here.

2. As you know Opportunity entity contains Estimated Close Date, lets create the opportunity record in CRM with below Estimated Closed Date set:

Useful tip for the Local and UTC setting in PowerApps

3. Now, while accessing the same opportunity through PowerApps, we came across different dates for the same opportunity as shown below:

Useful tip for the Local and UTC setting in PowerApps

4. In this scenario, the time zone of Dynamics 365 CRM instance on which we were working was set as Mountain Time as shown in below screenshot:

Useful tip for the Local and UTC setting in PowerApps

But the app was running on phone where time zone was set as Indian Standard Time.

To avoid such scenarios there is a simple Date Time Zone setting in PowerApps that can be used while creating/updating records in Dynamics 365 CRM through PowerApps.

5. In the next scenario, it was observed that the Date Time Zone in PowerApps was kept as UTC option which was converting the date in UTC format and hence the difference in date field.

Useful tip for the Local and UTC setting in PowerApps

6. We simply changed Date time zone setting to Local option and it worked. Change it to Local as shown in below screenshot:

Useful tip for the Local and UTC setting in PowerApps

7. In this case, if you observe Estimated Close Date reflected in PowerApps then you will see that it is exactly same as latest date value in CRM. You can see in our example that the same date has been set in the PowerApps:

Useful tip for the Local and UTC setting in PowerApps

Conclusion

With this simple setting in PowerApps user can handle date and time field effectively.

services

How to generate Power BI report based on logged-in user in Dynamic 365 CRM Online (restricted to his own record)

$
0
0

Note– Data in report will not follow security roles of logged-in user.

Introduction

In this blog we will see how to generate Power BI report based on logged-in user in Dynamic CRM Online.

Step 1

Create a report in Power BI desktop.

Power BI

Step 2

Create a role in Power BI desktop.

Go to modelling -> manage roles -> Create new role here.

Power BI

Notes:

While creating DAX expression-

  • Create condition like above
  • [domainname]-This contains email id of user
  • Userprincipalname ()-returns logged-in user email id
  • We are comparing with email id because Power BI returns users email id only

Difference between Username () and Userprincipalname ()-

Username () return user in domain/user format – (Logged-in user on system).

Power BI

Userprincipalname () return user in user (email id) format.

Step 3

After creating a role apply that role.

Go to modelling -> view as role -> select role which you have created.

Power BI

Step 4

Create relationship in Power BI desktop between system user’s entity and other entity which you are using while creating report.

Go to Home -> Manage relationships -> new

Create new relationship here.

Select primary keys as shown below.

Power BI

Step 5

Now publish report to Dynamic 365 CRM and pin that report on dashboard.

Go to CRM and add that dashboard:

  • Publish report from here.

Power BI

  • Select your workspace.

Power BI

  • Click on Pin Live Page to make Power BI report visible on dashboard.

Power BI

  • Give a name to your dashboard and make it live.

Power BI

  • Go to CRM and add this dashboard

Power BI

Here choose your workspace and dashboard.

Power BI

Step 6

Now go to Power BI service.

Power BI

Click on your dataset -> Security.

Power BI

Add user’s email for whom you want the Power BI dashboard to be visible in CRM.

Power BI

Step 7

After adding on dashboard share that dashboard to other users.

Power BI

Step 8

After sharing the dashboard please log in with the user credentials for which you have shared the report and add that dashboard. You can see report with user logged-in data.

Report of admin (Report Creator):

Power BI

Report of user 1:

Power BI

Report of user 2:

Power BI

Conclusion

We are able to see Power BI reports in Dynamic CRM Online based on logged in user.

Inogic has always been an early adopter of latest Microsoft technologies and our talent pool of consultants and developers can assist you with setup, development, and configuration of Power BI reports for your easy to complex reporting needs. Write to us at crm@inogic.com to get started with Power BI!


PowerApps Portals, AI Builder, 400 new features et al – The “Vow” experience at MBAS 2019

$
0
0

Well, even “Vow” would be an understatement. Yes, that’s what we have experienced at our first Microsoft Business Application Summit 2019 which was recently wrapped up at Atlanta. Our Booth 22 was just buzzing with more and more interactive discussions on how we could together move ahead on this journey of digital transformation on Power Platform !!

The first thing that came to our mind was – were two days enough? A Big Big thanks to MBA Summit team for organizing and delivering such an eventful experience. This is huge step taken towards laying the foundation for upcoming innovations and inventions.

SummitEMEA

#MSBizAppsSummit is over, but there’s so much more in store! Explore 200+ sessions, workshops, and keynotes on demand in the Power Platform Community: https://powerusers.microsoft.com

View Microsoft PowerApps: Vision and roadmap here!

To continue learning in online communities visit below links;
Microsoft Power BI | Microsoft PowerApps | Microsoft Flow

Maplytics (Your favorite Maps integration solution for Dynamics 365 CRM and PowerApps) our flagship project garnered most of the attention with its exclusive features like Geo-analytics, Routing, Appointment Planning, Shape Layer, Territory Management, etc. at the Summit. It’s always a different experience to meet the users on 1:1 and listen to how Maplytics has been helping them in analyzing their Dynamics CRM data and plan their routes, appointments, territories in a much better way.

That’s not it, we also introduced two of our new apps Attach2Dynamics and Alerts4Dynamics for Dynamics 365 CRM at Summit which now along with our other productivity apps Click2Export, Click2Clone, Inolink, User Adoption Monitor have been favorite time saving Apps and helping Dynamics CRM users focus more time on managing and selling than on manual work.

Some beautiful memories from our time at summit.

Looking forward to meeting you all at our next destination, Booth 1331 at CRMUG Summit to be held during October 15 – 18, 2019 at Orlando, Florida.

In the meanwhile, you can reach us on crm@inogic.com to discuss and understand how our solutions and Dynamics CRM development services can help you to get the most out of your Dynamics 365 implementation!

If not done yet, you can also download and try our Dynamics 365 CRM Apps from our Website or Microsoft AppSource.

Viewing all 3363 articles
Browse latest View live


Latest Images