Introduction:
When we have visual elements to support the data, our analysis becomes relatively simple. With Dynamics 365 we can add custom icon and tooltips to the fields in Views. We can add it using the JavaScript through Web resource.
Let’s see how we can add custom icon and tooltip to columns in views:
Suppose I have a custom field “Approved” with two options, on the Account.
For the option “Yes” with tooltip “Approved” – I want the icon to be:

For the option “No” with tooltip “Not Approved” – I want the icon to be:

Follow the steps below to achieve this:
- Dynamics CRM usually resizes the icons, so get the icons in 16 x 16 dimension.
- After getting the icons in the above mentioned size, add 2 Web resources “new_Approved” & “new_NotApproved” icons to webresource in Dynamics CRM.
- Add the below Javascript webresource “new_SetIconAndTooltip.js” in Dynamics CRM:
function getRowInfo(rowVal, userlcid) {
debugger;

var imageName = "";
var tooltipValue = "";
var resultarray = null;

try {

//get the row Info
var row = JSON.parse(rowVal);

//get the Value of Custom Field (Column)
var rdata = row.new_approved_Value;
//If yes then set Approved icon and tooltip
if (rdata == true) {

imageName = "new_Approved";
tooltipValue = "Approved";
} //If No then set Approved icon and tooltip
else {

imageName = "new_NotApproved";
tooltipValue = "Not Approved";

}

resultarray = [imageName, tooltipValue];
} catch (e) {

//Handle Error
}


return resultarray;
}
As seen in the code, the above function takes 2 parameters.
rowval: Row Information
userlcid: User Local Identifier which can be used for language information for the Tooltip, as per requirement.
After following the above steps, let’s explore how to attach the above script to the specific view.
- Navigate to Settings → Customizations → Account → Views
- Open the “Active Accounts” view.
- Select the “Approved” column and click Change Properties. After this you will reach to “Change Column Properties” as seen in the below screenshot:
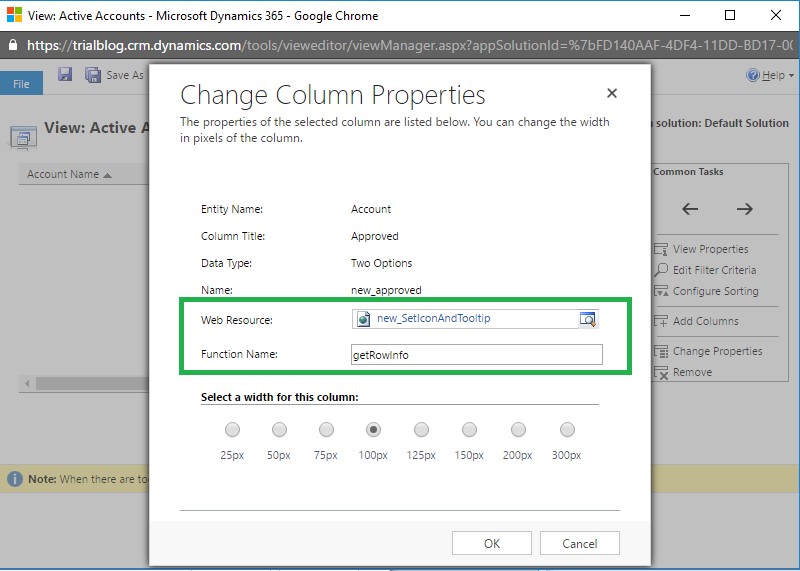 4. In the Web Resource, select the uploaded script and enter the function name.
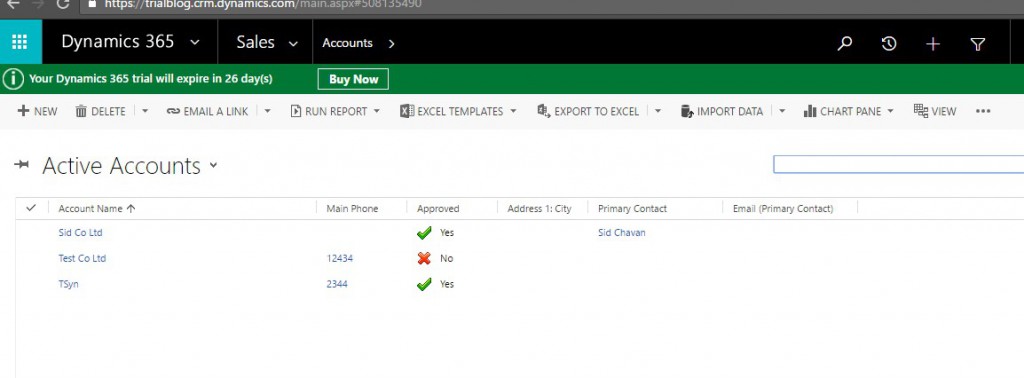
5. Once you’re done, click Ok. Then save and publish the changes. Now navigate to “Active Accounts” view in Dynamics CRM you will see the below screen:
Conclusion:
This nifty feature will enable you to add any indicator icons in the “Views” for visually distinguishing data in Dynamics 365.
To stay updated with Dynamics 365 new features, visit Inogic Blogs!