Introduction:
In one of our recent blog, we saw how to integrate SharePoint online with Dynamics 365. In this blog will discuss about how to import Microsoft Flow in your Dynamics 365 environment.
Steps to Import Microsoft Flow in Dynamics 365:
1. First, Login to CRM with a user who has Global Administrator access to Dynamics 365 environment.
2. Navigate to other applications as shown in below screenshot.


3. On click of “Flow”, the Microsoft Flow UI will open, where you can “Import” the provided or exported “MicrosoftFlow.zip” file.

4. Then Click on Upload button and select the zipped Microsoft Flow file using as shown in below screenshot.

5. Once the valid file is submitted for further processing you will see the below window where you need to configure the Microsoft Flow import.

a. In 1st, option you have two options either you can overwrite existing Microsoft Flow or create a new one. For now let’s select “Create as new” as shown in below screenshot.

On select “Create as New” you can set the Microsoft Flow name to identify it.

b. In second option, to connect the submitted Microsoft Flow for importing we need the connection with Dynamics 365 v9.0.
All you need to do is to click on “Select during import” and in the popup window click on “Create new”.

Once you click on “Create new”, search for the Dynamics 365 connection and click on “+” icon in selected row record.

Then click on “Create” button and select the current logged in user’s credentials so you can directly get the connection of Dynamics 365.

In the next step, you will find the connection of D365 their so select it and save the same.
Note: Make sure you checked the connection.

c. In third option, you need to follow steps same as we saw in second option but this time will choose SharePoint, so click on “Create new” and search for “SharePoint” and add it by clicking “+” button. Then refresh the list in 3rd option then select SharePoint and save.
Note: While adding connection make sure you have selected “Cloud Gateways”.

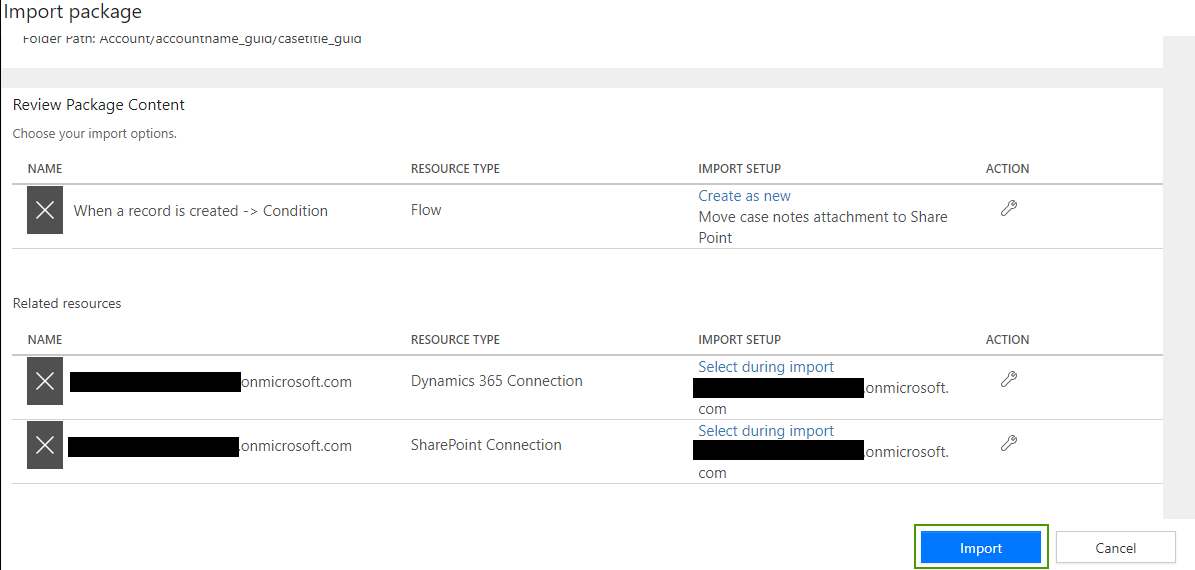
6. Once all connection done, the screen will look like below, here click on Import button.

7. Once the Microsoft flow successfully imported you will see the below confirmation screen.

8. Click on “Open Flow” and change the Organization name and SharePoint URL as per you system.
Organization Name: you can find the D365 organization name in drop down.

Site Address: Use the “Enter Customer Value” option to setup SharePoint URL accordingly.

Enter your SharePoint URL:

In update step of notes description also mention your “SharePoint” URL as shown in below screenshot.

Note: Make sure you have selected correct organization and replaced correct SharePoint Site address.
9. Save Microsoft Flow.

10. Then Import and configuration process of Microsoft Flow is completed.
Conclusion:
User can import Microsoft Flow in Dynamics 365 using above simple steps.
