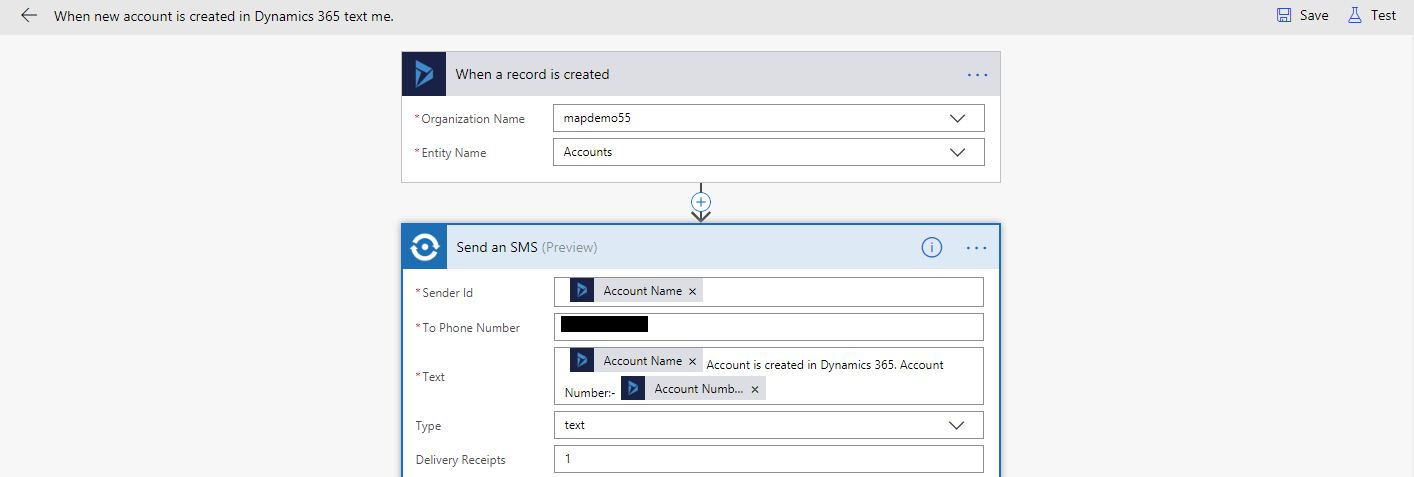
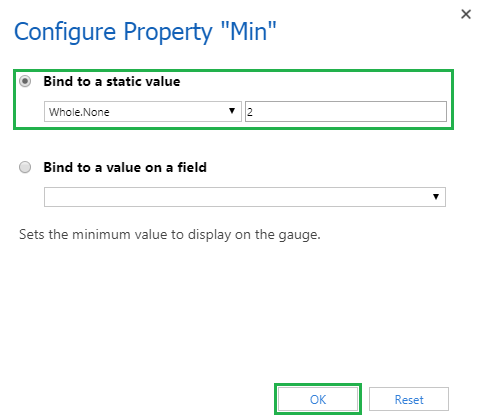
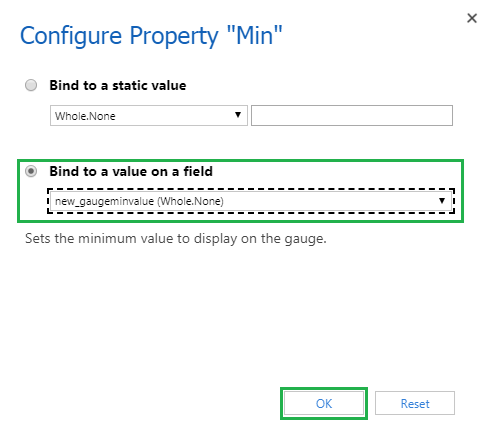
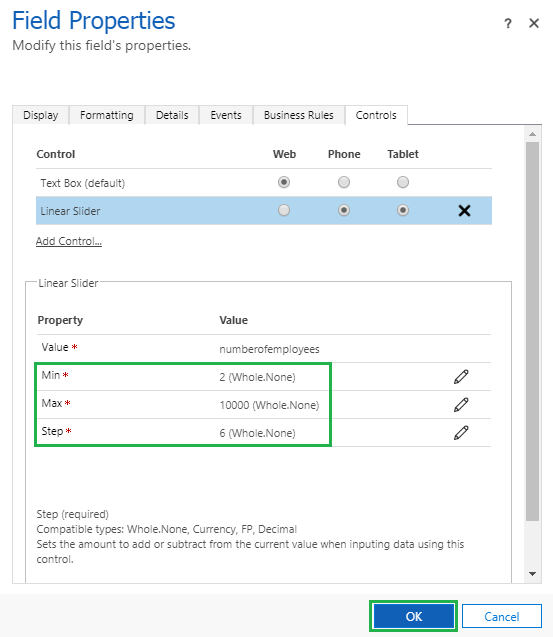
Introduction
Many times the customer wants to see the history of managed and unmanaged solutions so in this blog we will see how this can be implemented using “Solution History.”
A solution is a container that encompasses Dynamics 365 CRM components.
It is available in two flavors Managed and Unmanaged.
Managed solutions are usually used by ISVs to deliver the products developed by them, whereas unmanaged solutions can be used just for taking backup of entities or for any other purpose.
The components of a Managed solution are deleted if the solution is deleted whereas the components of the Unmanaged solution are not deleted on the removal of the Unmanaged solution.
Well, none of what is mentioned above is alien to a CRM developer or a CRM consultant.
However, the fascinating thing that has happened in recent times is the introduction of “Solutions History” piece in Dynamics 365 CRM.
With the help of Solution History component, you can keep track of all the solutions that are exported or imported. This is something that was made achievable with the help of XRMToolBox, but, to have the same level of information from within Dynamics 365 CRM is incredible.
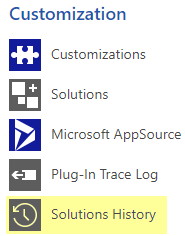
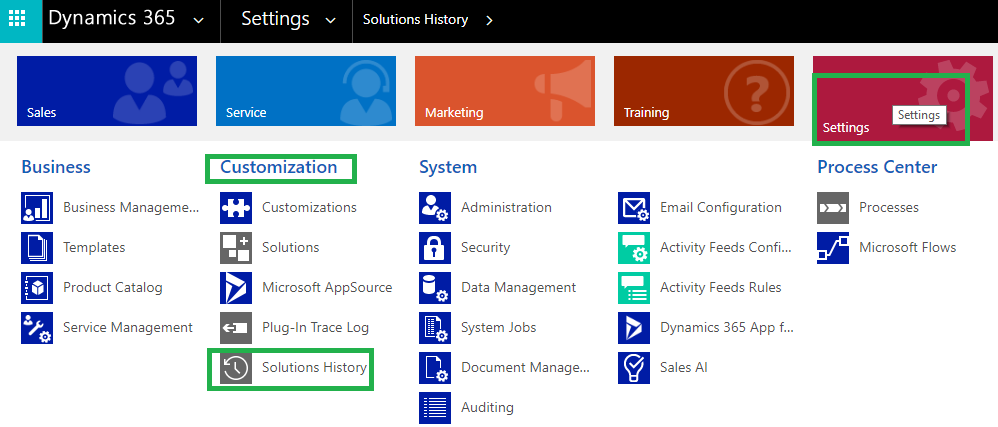
To access Solutions History, you need to, Go to Settings -> Under the Customizations Sub Area -> Solutions History.
![Solutions History Entity in Dynamics 365 CRM]()
Just to go through how the solution history records are created, will follow below steps:
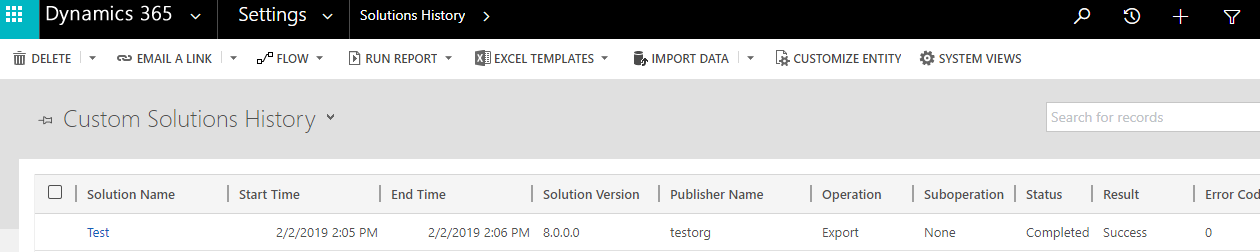
1. Navigate to Settings -> Solutions.
2. Create a new custom solution and export the solution.
3. Navigate to Settings and under the Customization group, you will find the Solution History sub area. Refer below screenshot.
![Solutions History Entity in Dynamics 365 CRM]()
4. Now you can see the record created in solution history.
![Solutions History Entity in Dynamics 365 CRM]()
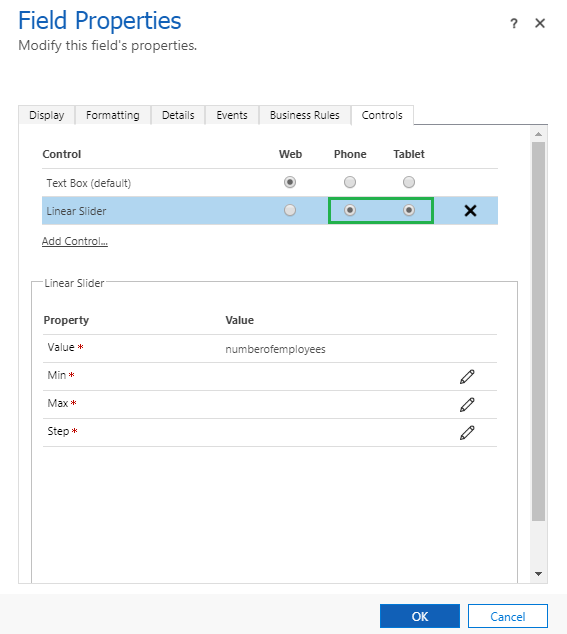
5. You can see the below information on the solution history record.
![Solutions History Entity in Dynamics 365 CRM]()
Solution name: This contains the name of the solution.
Solution version: The version of solution that was exported.
Publisher name: This contains the publisher name of the solution.
Sub operation: This includes whether it’s a new solution imported or updated the solution or deleting the solution.
Operation: It contains whether its import, export, uninstall etc.
Managed: It contains whether the import/export is managed solution or unmanaged. In the above example, I exported the unmanaged solution and hence the Managed field is set as “No.”
Start Time: It contains the time when process started.
End Time: It contains the time when process ended.
Total Time (seconds): Total time to complete the process. It’s shown in seconds form.
Result: It contains whether the process was failed or succeeded.
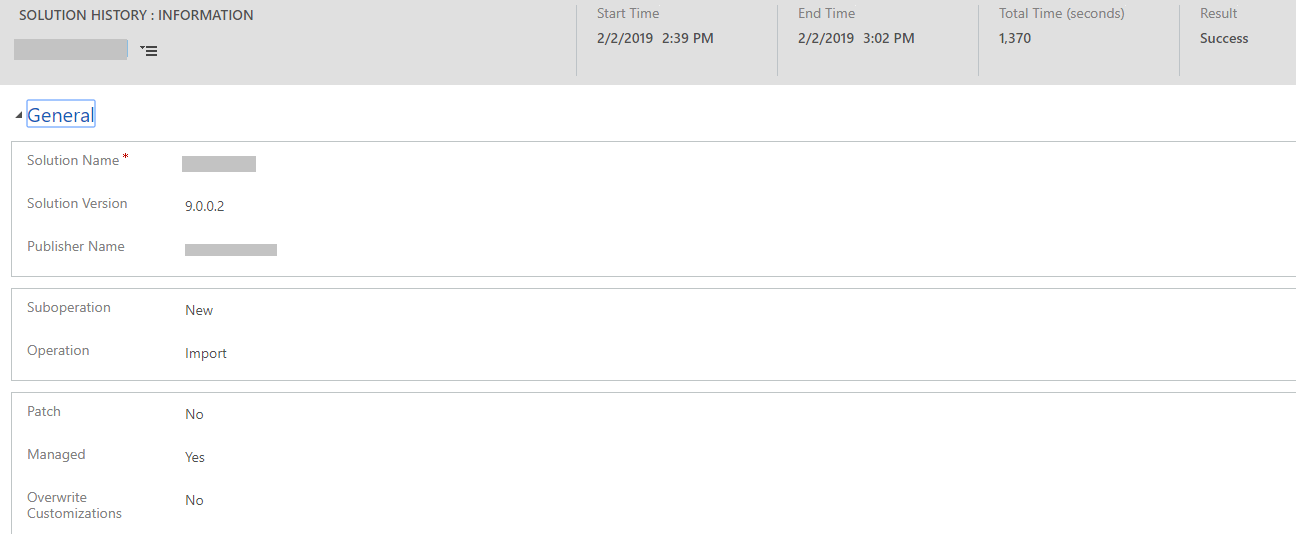
6. Now will import the new solution and let’s see the solution history record created.
![Solutions History Entity in Dynamics 365 CRM]()
When you import a custom solution, then the solution history record is created with above details.
This record will also contains the field such as “Overwrite Customization” and “Patch”.
These both fields are set as “No” since the solution import was neither in patch nor overwritten the customizations.
You can also see the “Suboperation” field as new, since the solution which was imported was new and it wasn’t any update to the existing solution.
7. Now let us see one example of failure too. I had already tried to delete one existing solution which failed and let’s see the solution history record created for the same.
![Solutions History Entity in Dynamics 365 CRM]()
Now in the above screenshot, you will be able to see the Result as “Failure.”
As I had tried uninstalling the solution which failed for some reason, hence “Suboperation” is set as “Delete” and “Operation” set as “Uninstall.”
It also contains the reason of failure i.e. Exception Message is displayed and also the “Error Code” of it.
This is how the Dynamics 365 has given us the feature to view the history of solutions and the actions taken on them.
- Now let’s move to the security roles –
The records created in the Solution History are “Read only”. The solutions history cannot be cleared by any user in CRM including System Administrator.
Only those users would be able to view the “Solutions History” record if the assigned security role has “Read” privilege to the Solutions History entity.
![Solutions History Entity in Dynamics 365 CRM]()
Even if you go to any security roles, you will not be able to give permission to the users to delete/create/write Solution History as there are no such options.
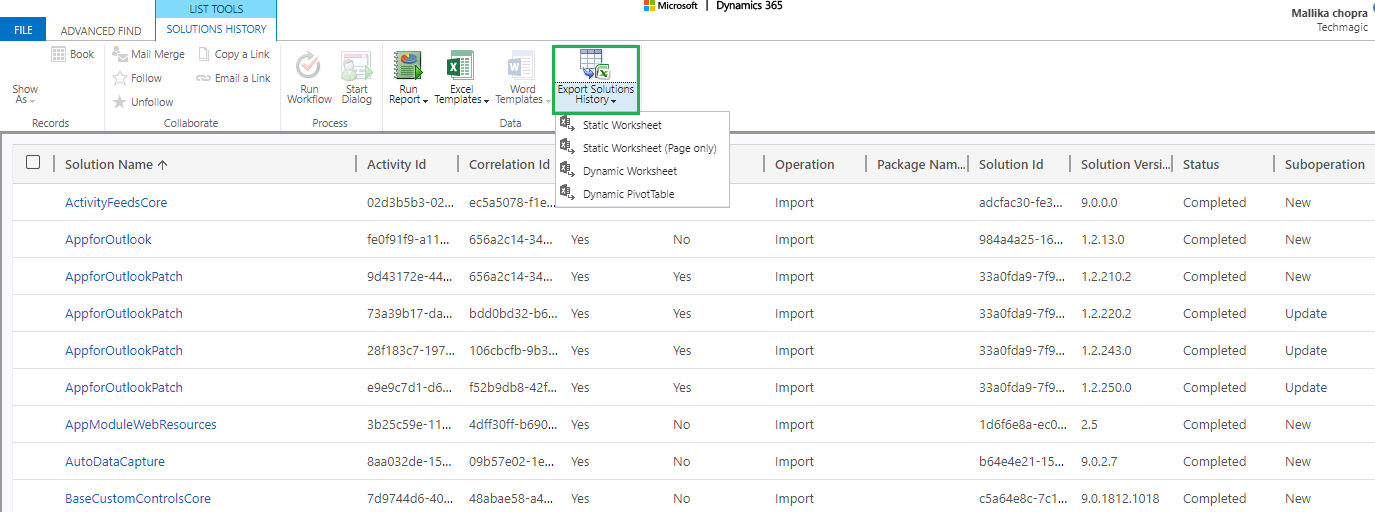
- You can also do the Advanced Find of Solutions history.
![Solutions History Entity in Dynamics 365 CRM]()
Select “Solution History” in the “Look for:” field and click on “Results.”
You will be able to see all the records of solution history.
If you want to review data in excel sheet, then you can also Export the data to excel sheet.
![Solutions History Entity in Dynamics 365 CRM]()
Conclusion
Solution history is the great piece added in Dynamics 365 CRM. This helps us to track the history of all solutions that were imported/exported/uninstalled without use of any third party tool.
![]()

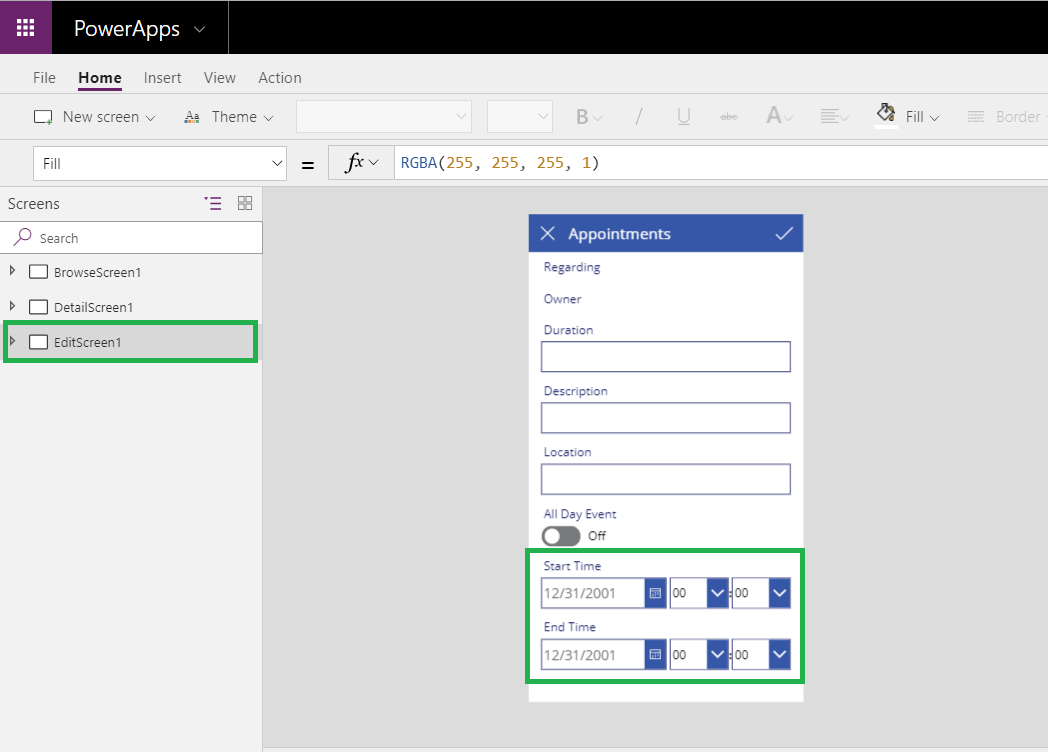

 in power App.